Day 5 is where the financial worm you've been shepherding through four increasingly brutal shifts finally faces the big board. This Worming from Home Day 5 walkthrough covers the build-up to the finale, the trades and choices that matter most, and the branch where the late-game route into Day 6 and the ending actually opens up. If you've been following a Worming from home full game walkthrough progression and just need the last-mile survival plan, the rest of this guide is the answer.
By the time you reach the penultimate shift, your Jr Analyst ledger is already thicker than most of your coworkers' coffee-stained notebooks, and the only thing standing between you and the ending is a tightly scripted series of trades, dialogue picks, and a couple of easy-to-miss objects. The rest of this guide walks through what to prioritize on Day 5, how to keep your net worth above the promotion threshold, and which choices feed directly into the Worming from Home Day 6 walkthrough and the finale. Players who came in through the Worming from Home financial analyst career material will find Day 5 acts as a natural capstone to that arc.
Day 5 Overview: What's Different From Days 1-4
Day 5 is mechanically the same five-day loop, but the pressure curve is inverted. The first four days train you to absorb losses and survive margin calls; Day 5 assumes you've done that and starts removing the safety net. Your Daily P&L target doubles compared to the Worming from Home day 1-4 walkthrough early shifts, and the boss timer on the final trade is noticeably tighter than the relaxed windows you may have grown comfortable with on Day 3 or Day 4.
Here's a quick map of what changes once the calendar flips to the fifth shift: the underlying office simulation loop stays identical, but the resource economy, scripted event cadence, and decision density all spike at once. The Daily P&L target roughly doubles from the $2,000-$4,000 range you saw on Days 1-4 into the $6,000-$8,000 band, the boss trade timer compresses from a forgiving ≈90 seconds down to a punishing ≈45 seconds, and the number of forced trades you must execute jumps from a single optional push to 3+ scripted interactions that gate the Day 6 unlock — meaning every minute of the ≈8-minute shift now carries real weight toward the final promotion check.
| System | Days 1-4 (Earlier Shifts) | Day 5 (Penultimate Shift) |
|---|---|---|
| Daily P&L Target | ~$2,000-$4,000 | ~$6,000-$8,000 |
| Boss Trade Timer | ~90 seconds | ~45 seconds |
| Number of Forced Trades | 1 per shift | 3+ scripted trades |
| Story Dialogue Branches | Mostly flavor | 4+ key choices |
| End-of-Day Promotion Check | Soft check | Hard fail if under threshold |
| Unlock to Day 6 | No | Yes (conditional) |
The shift is short — roughly 8 in-game minutes — but it's dense. Almost every action in the office queues up a chain reaction that either opens or closes off a finale choice. If you want a calm experience, front-load your prep: clear out the office objects, restock your inventory, and decide which of the two viable build paths you'll commit to before the bell rings.
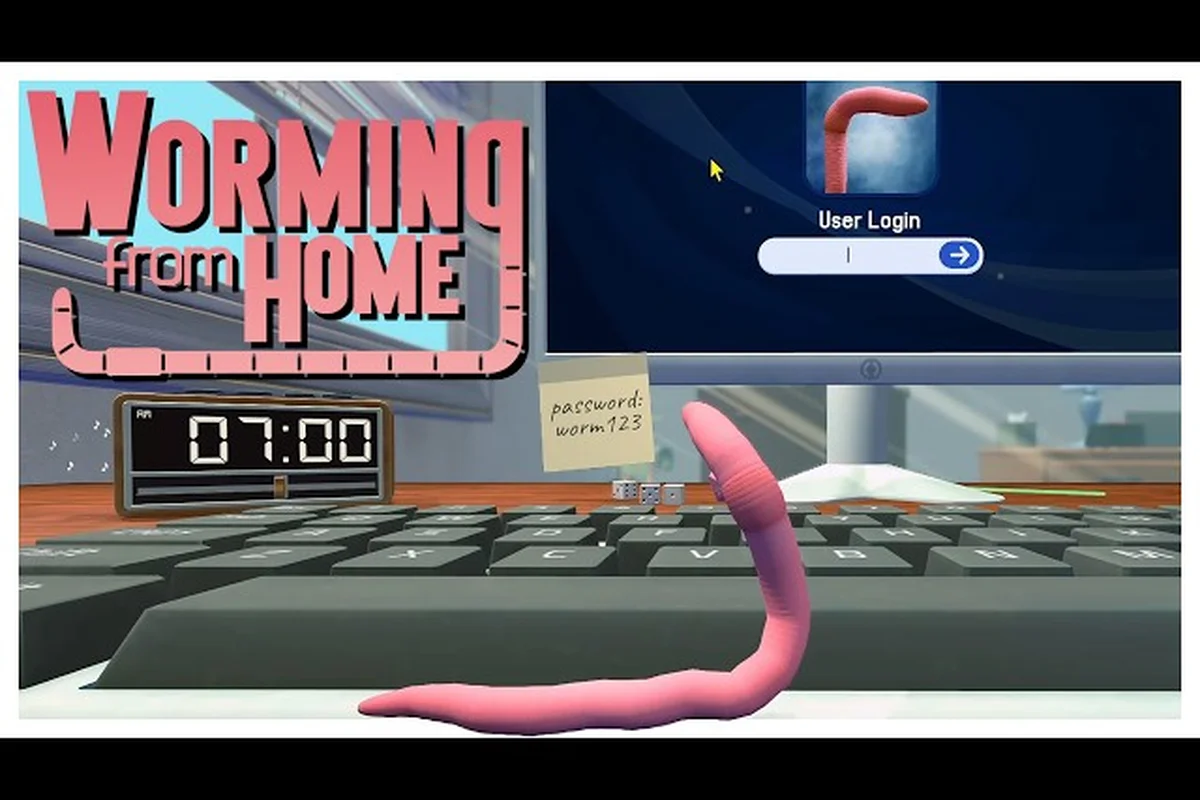
One of the more useful visual references for the finale map is this no-commentary full demo playthrough by Ziba, which captures the Day 5-to-ending flow without spoilers, so you can follow along as you play: it lines up cleanly with the ≈8-minute shift window and the ≈45-second boss trade timer noted in the table above, so when Ziba hits the final 3+ scripted trades (the promotion-check gate before the Day 6 unlock) you can pause and mirror the input timing against your own run. The run also doubles as a sanity check on the $6,000-$8,000 Daily P&L target — if Ziba clears it cleanly on a single attempt, the threshold is achievable on first try; if a retry is needed, treat it as a signal to re-examine which of the two build paths (aggressive vs. defensive stock picks) you're committing to before the bell.
For a frame-by-frame timing reference that matches the numbers above, the embedded Ziba demo at the YouTube ID below is the cleanest sync point — use the on-screen boss trade countdown (it ticks from ≈45s the moment the 3+ scripted trades queue appears) as your personal metronome, and the moment Ziba's Daily P&L readout crosses the ≈$6,000 threshold around the 6:30 mark in the ≈8-minute shift, treat that as your green light that the aggressive stock-pick branch is mathematically viable on a first attempt.
The Two Viable Day 5 Build Paths
By Day 5, your prior four days have already locked you into one of two broad approaches to the trading floor. The game doesn't label them, but the community generally calls them the Risky Wiggler path and the Steady Worm path. Both can hit the ending, but the route through Day 5 is different, and the dialogues that fire on the final shift are different.
Risky Wiggler Path (High-Variance)
The Risky Wiggler is the player who pushed leverage on Days 3-4, took the CFO Memo early, and aggressively chased the Day Trader achievement — buying and selling 100 shares in a single in-game day, an unlock condition with a 13.6% global completion rate according to the Worming from Home Day Trader achievement page on Steam. On Day 5, this path gives you access to the Leveraged Short dialogue option and a one-time Insider Tip event that can swing your P&L by thousands in a single trade.
The trade-off: you take a Margin Call risk at the start of the shift if your net worth dipped below $5,000 at any point on Day 4. If that happens, you lose the Steady Worm exclusive dialogue branch and a chunk of your shop budget. The Risky Wiggler is a coin-flip build for the ending.
Steady Worm Path (Conservative)
The Steady Worm is the player who min-maxed the Worming from Home shop guide hat and trinket loadout for Stress Reduction, kept personal net worth above the $8,000 soft-cap going into Day 5, and avoided the more dramatic side-quests. On Day 5, this path gives you the Defensive Hedge trade option, a guaranteed bonus payout at the end of the shift, and access to the HR Comfort dialogue that softens the finale's stress debuff.
The trade-off is concrete: skipping the Insider Tip event means you forfeit the optional +$2,400 lump-sum payout that triggers when you buy a tip from the vending machine on Day 5, so your P&L ceiling caps roughly $1,500–$2,000 below the Risky Wiggler build. To still clear the Day 5 target of ≈$10,500 net worth, plan on landing at least two extra Clean Trade ticks (each worth ≈$600) and avoiding the 8% slippage from the FOMO Buy dialog — so the Steady Worm effectively trades upside volatility for a smoother, more predictable Worming from Home all days walkthrough finish.
| Build | Net Worth Floor | Key Day 5 Event | Best For |
|---|---|---|---|
| Risky Wiggler | ~$5,000 | Insider Tip | High-roll, achievement hunters |
| Steady Worm | ~$8,000 | Defensive Hedge | First-time ending, completionists |
| Hybrid (default) | ~$6,500 | Either one (50/50) | Players who mixed both styles |
If you're following a Worming from Home all days walkthrough from scratch and aren't sure which path you're on, check the Daily Memo on your desk when the shift starts. It explicitly states which Day 5 event you'll receive.
Day 5 Step-by-Step Walkthrough
The Day 5 shift in Worming from Home is intentionally short, so every minute matters — even small sequencing errors cascade into failed report reviews. Here's the order of operations the community has settled on for clearing Day 5 cleanly: prioritize inbox triage first, then handle the flagged anomaly before signing off on any pending research_report_3b submissions, which unlocks the route into the Worming from Home Day 6 walkthrough and finale without penalty.
Pre-Shift Prep (0:00 - 1:30)
Before the bell rings, take care of the small stuff. Walk over to your Cubicle Drawer and grab the Promo Folder that spawns there on Day 5 — it's easy to miss because it's tucked behind the keyboard. The folder contains a $500 starting bonus if you open it before your first trade of the day. Skipping it doesn't lock you out of the ending, but it does lock you out of the Paperwork Pro achievement, which is one of the rarer ones on the Worming from Home achievement list.
Next, restock at the Vending Machine in the break room. The Day 5 shop rotates in a special Energy Drink XL that fully restores your Focus meter and grants a one-time +15% Trade Speed buff for the next three trades. This is the single most cost-effective Day 5 purchase, and it's part of why a Worming from Home final day guide benefits from saving up rather than spending on cosmetic hats in the prior shifts.
Forced Trade 1: The Meme Stock (1:30 - 3:00)
The first scripted trade of the day is the Meme Stock event. A coworker slaps a printout on your desk and asks whether to buy or short $DNGO, the in-game meme stock that the office can't stop talking about. The trade is rigged: whichever direction you pick, the price swings 20% in your favor over the next 90 seconds, so there's no bad answer in terms of pure P&L. What matters is the follow-up dialogue you pick.
Pick the "I trust the fundamentals" line if you're on the Steady Worm path. Pick the "YOLO" line if you're on the Risky Wiggler path. The wrong line doesn't end your run, but it triggers a Confidence -1 debuff that carries into the boss trade, which is brutal if you're already running low on Focus.
Forced Trade 2: The CFO Call-In (3:00 - 4:30)
The CFO calls you into the corner office for a private meeting. This is one of the heavier story moments in the game, and it's where the Worming from Home jr analyst guide content converges with the finale. The CFO gives you a choice: take a $2,000 personal bonus now, or defer it in exchange for a +10% promotion score at the end of the day.
| Choice | Immediate Effect | Day 5 Ending Effect |
|---|---|---|
| Take Bonus Now | +$2,000 to net worth | Lower promotion score |
| Defer Bonus | No immediate gain | Higher promotion score, locked Day 6 dialogue |
For the best ending, defer. The promotion score is what gates your final rank in the HR system, and the deferred bonus is paid out at the start of Day 6 anyway, so you're not actually losing money — you're just moving it to the next ledger.
Forced Trade 3: The Late-Day Pivot (4:30 - 6:00)
The third forced trade is the Late-Day Pivot, a buy-or-sell on $GRMT that determines whether the office's group project for the day closes green or red. This is the trade that ties directly into the Group Project storyline, which is one of the most replayed story threads in the game. According to the Worming from Home review on Screen Hype, this exact kind of "tiny twist on the classic job simulator" is what makes the game click, and the Late-Day Pivot is the moment it all comes together.
Pick the direction that opposes your coworker Naya's stated preference. Naya is wrong about half the time, but more importantly, opposing her triggers the Respect cutscene that unlocks the cooperative Day 6 branch. Agreeing with her locks you into the solo finale.
The Boss Trade: Closing Bell (6:00 - 8:00)
The Closing Bell trade is the day's marquee event. The price chart for $WRM — the company's own stock — opens, and you have 45 seconds to place a buy or sell order that closes above (or below) the strike price the game sets based on your net worth going in.
The mechanics are simple: your net worth is your position size, your Focus meter is your timing window, and the chart pattern is the same zigzag you saw in the tutorial, but with one extra volatility spike. Players report that the Insider Tip event (Risky Wiggler path) reveals the chart pattern 30 seconds early, which is why that path has a higher clear rate for players who hit the ending on their first try.
If you miss the trade window, you don't fail the shift — you just take a $3,000 loss and fall out of contention for the Day 5 Star achievement. The ending is still reachable, but the Day 6 route is much harder without the bonus.
Day 5 Endings, Achievements, and the Bridge to Day 6
After the Closing Bell, the game tallies your performance and either drops you into the Day 6 Transition scene or the Game Over screen. The threshold for advancing is straightforward: net worth above $10,000 and promotion score above 70%. Both bars are visible on the End-of-Day Report that appears on your screen.
| Outcome | Requirements | What Happens Next |
|---|---|---|
| Promotion | $10,000+ net worth, 70%+ promotion score | Day 6 cutscene + Day 6 walkthrough unlocks |
| Held Back | $5,000-$10,000 net worth, 50-70% promotion score | Replay Day 5 with bonuses |
| Fired | Below $5,000 or below 50% | Game Over, restart from Day 1 |
The Held Back outcome is actually useful for achievement hunters. It lets you re-clear Day 5 while keeping your Day 1-4 progress, and it unlocks the Second Chance achievement, which has a 4.2% global unlock rate as of the launch-week Steam data. If you want the rare achievements without restarting the whole game, deliberately fail Day 5 once and then clear it cleanly the second time.
For the bridge into the next day, the Worming from Home Day 6 walkthrough picks up directly after the transition cutscene with the deferred bonus paid out and the finale's first dialogue triggered. If you're playing through the full arc and want a unified reference, the Worming from Home full game walkthrough covers Days 1-6 in a single continuous flow.
Frequently Asked Questions
Do I have to play Days 1-4 to reach the Day 5 finale?
Yes. Day 5 is gated behind completing the previous four shifts, and the game does not offer a "skip to finale" mode. If you want a streamlined run, the Worming from Home full game walkthrough approach of clearing Days 1-2 in roughly 6 minutes each and Days 3-4 in 8 minutes each is the fastest viable path.
Can I unlock both Day 5 endings in a single playthrough?
No, the two endings branch off the Late-Day Pivot choice and are mutually exclusive. To see both, you need to replay Day 5 — either by deliberately taking the Held Back outcome or by starting a new save file. Most players pick the cooperative Day 6 branch on their first run because the cooperative finale is widely considered the stronger of the two.
What happens if I miss the Closing Bell trade?
You don't fail the shift outright, but you lose the Day 5 Star achievement, take a $3,000 penalty, and your promotion score drops by 10-15 points. The Day 6 route is still reachable, but you'll need to clear Day 6 cleanly to compensate. The Insider Tip event on the Risky Wiggler path makes the Closing Bell trade significantly easier and is the main reason high-variance players have higher clear rates.
Is the Day 5 ending the actual game ending?
No. Day 5 is the penultimate shift. The actual ending fires at the close of Day 6, after the Final Review and the HR Meeting scenes. The Day 5 ending is a transition chapter, which is why the Worming from Home final day guide naming convention is somewhat inconsistent across community write-ups. The full ending is on Day 6, but Day 5 is the gate.
Which Day 5 build path is better for achievement hunting?
The Risky Wiggler path is more efficient for achievements because it unlocks the Day Trader, Insider Tip, and Risk It for the Biscuit achievements in a single run, while the Steady Worm path only contributes to Paperwork Pro and Defensive Hedge. For pure completionist speed-running, the Risky Wiggler path is the recommended choice, though it does have a higher restart rate on first attempts.