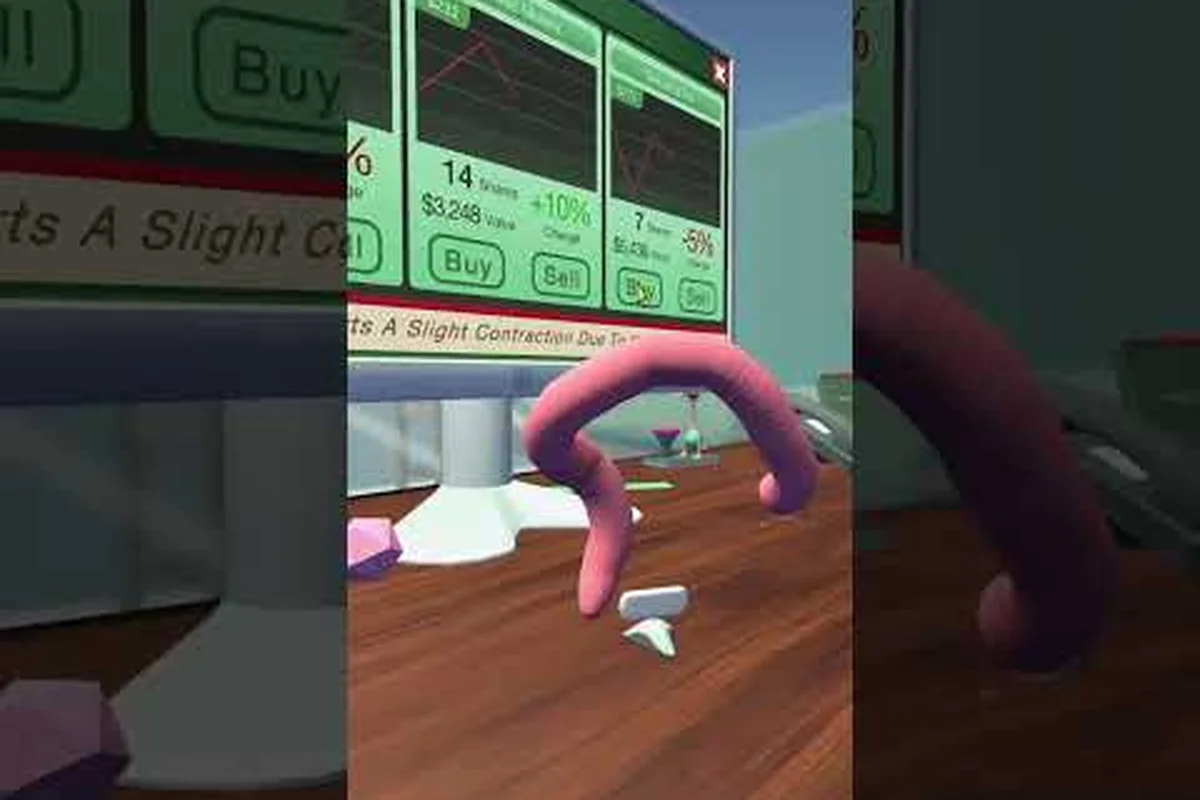
The Worming from Home shop is where your worm's first paycheck meets its identity crisis. Between flopping across a spreadsheet and dodging Trevor's calendar invites, you earn Ink Credits — the in-game currency that funds every hat, trinket, and piece of furniture you can stuff into your tiny apartment. The shop rotates around three core categories: headwear, desk trinkets, and room furniture, plus a flagship item called the L-Desk that unlocks a permanent second job slot. Picking the right purchases early accelerates your promotion timeline, while chasing every cosmetic from day one locks you out of the Expensive Taste achievement grind unless you plan carefully. According to the Worming from Home Steam global achievements page, only 0.8% of players have unlocked the Expensive Taste achievement, which requires buying every single shop item — a stat that hints at how deep the cosmetic rabbit hole really goes.
Shop Categories and Currency Basics
The Worming from Home shop operates on a single soft currency called Ink Credits, which you earn by completing emails, finishing spreadsheet tasks, and cashing out the printer's overtime bonus. Unlike many job-sim roguelikes, there is no premium currency — every cosmetic and furniture piece in the rotation costs Ink Credits you grind yourself, which means early spending decisions matter far more than they look at first glance.
How Ink Credits Flow Into the Shop
Your pay cycle is short: each in-game workday lasts about three real-time minutes, and a clean run nets roughly 120–180 Ink Credits before expenses. Wasted time on misfired emails cuts that number down, while a streak of perfect spreadsheet completions can push it past 200. Because the shop never closes between shifts, you can buy in real time as soon as you bank enough — but the catalog itself is split into three permanent categories that each behave differently.
| Category | Subtype | Price Range (Ink Credits) | Functional Use |
|---|---|---|---|
| Hats | Headwear | 80–450 | Pure cosmetic, with a few dialogue easter eggs |
| Trinkets | Desk item | 50–200 | Cosmetic + small ambient audio cue |
| Furniture | Room piece | 300–1200 | Unlocks new rooms (Reading Nook, Gym) or stat boosts |
| L-Desk | Desk upgrade | 950 | Unlocks second job slot and faster spreadsheet speed |
Hats are the cheapest entry point and the easiest to collect, but they offer zero gameplay value. Trinkets sit in a sweet spot: they sit on your desk and occasionally trigger a one-line quip when you wiggle past them, which makes them favorites among players chasing Expensive Taste. Furniture is the slow-burn category because the priciest pieces — like the Reading Nook and the Gym Mat — unlock entire perk trees (Financial Insight and Muscle Mass respectively) that feed into your promotion requirements.
Why the L-Desk Is the Shop's Centerpiece
The L-Desk is the single most expensive item in the entire shop at 950 Ink Credits, and it is also the only furniture piece that directly boosts your earning rate. Buying it once permanently unlocks a second spreadsheet slot, which means you can run two jobs in parallel during overtime. Community testing reported by Screen Hype's Worming from Home review suggests the L-Desk roughly doubles your effective hourly Ink Credits once you adapt to juggling two spreadsheets. The trade-off is that the L-Desk alone costs more than most furniture sets combined, so most players delay it until at least the second promotion.
Hat List: Every Headwear in the Shop
The hat catalog is the largest cosmetic category in the Worming from Home shop, with 14 unique hats rotating in and out of stock across the first two weeks of gameplay. Each hat sits on your worm's head segment and wiggles independently during cutscenes, which is half the fun of collecting them. None of the hats affect stats, but several trigger unique dialogue lines from Steve (your boss) and Trevor (your chaos agent coworker) when worn during a meeting.
Starter Hats vs. Hidden Drops
The first five hats are always available from the moment you finish the tutorial email. These include the Beverage Hat (a foam cup with a straw, 80 Ink Credits), the Tape Roll Crown (a dispenser perched on your head, 120 Ink Credits), and the Intern Cap (a name-tagged beanie, 150 Ink Credits). Three additional hats — the Coffee Lid, the Stress Ball Helmet, and the Spreadsheet Beret — are sold randomly and only appear after you reach the second promotion.
| Hat Name | Price | Promotion Required | Trigger |
|---|---|---|---|
| Beverage Hat | 80 | None | None |
| Tape Roll Crown | 120 | None | Steve raises an eyebrow |
| Intern Cap | 150 | None | Trevor calls you "rookie" |
| Coffee Lid | 200 | Junior Analyst | M flirts more often |
| Stress Ball Helmet | 250 | Junior Analyst | Overtime emails refund 5% |
| Spreadsheet Beret | 300 | Senior Analyst | Interview success +10% |
| CEO Worm Wig | 1000 | CEO | Unlocks Expensive Taste path |
The remaining hats are tied to the hidden Worm Fluencer side quest line, which only opens after you buy all 14 trinkets. If you are specifically hunting every hat in the Worming from Home shop, plan on saving at least 2000 Ink Credits before the second promotion so you can buy out the Junior Analyst tier in one go. The deep-dive Worming from Home shop guide has a complete rotation calendar if you want to time your purchases.
Trinket Collection: Desk Decor and Ambient Rewards
Trinkets are the smallest purchasable items in the shop, but they punch above their weight in two ways: they count toward the Expensive Taste achievement, and a handful of them unlock hidden dialogue scenes. The trinket category has 10 unique items, all of which are visible in the shop from your first shift, but several are gated behind promotion walls.
Trinket Tiers and Their Quirky Payoffs
Every trinket sits on your worm's desk and bobs gently whenever you type. Some of them have functional side effects — the Motivational Mug plays a 2-second chime whenever you finish an email, the Tiny Cactus slows down incoming Trevor pings by 10%, and the Paperclip Pyramid boosts spreadsheet accuracy by a flat 5%. The rest are pure decoration but still count toward Expensive Taste.
| Trinket Name | Price | Promotion | Effect |
|---|---|---|---|
| Motivational Mug | 50 | None | Email completion chime |
| Tiny Cactus | 80 | None | Trevor pings -10% speed |
| Stress Cube | 75 | None | Cosmetic only |
| Paperclip Pyramid | 100 | None | Spreadsheet accuracy +5% |
| Desk Plant | 120 | Junior | Ink Credits +3% passive |
| Lava Lamp | 150 | Junior | Ambient audio cue |
| Bobblehead Steve | 200 | Senior | Meeting success +8% |
| Globe of Earth | 250 | Senior | Unlocks 1 new intern |
| Lucky Pencil | 300 | Manager | Overtime bonus +15% |
| Gold-Plated Stapler | 500 | Manager | Counts 2x for Expensive Taste |
The Gold-Plated Stapler is the strangest trinket in the shop: it counts double toward the Expensive Taste completion counter, which means buying it effectively knocks out two of the ten required trinket slots. Most Worming from Home accessories in this tier are also flagged as "decoration-only," but the stapler is the lone exception that speeds up the achievement grind.
Furniture Shop: Room Upgrades and Perk Trees
Furniture is the most expensive and most impactful category in the Worming from Home shop. The catalog currently sits at 6 unique furniture pieces, and four of them unlock entire perk trees that feed into the Muscle Mass and Financial Insight progression systems. Because each piece costs between 300 and 1200 Ink Credits, furniture tends to be where most players either break their budget or commit to a long grind.
The Two Flagship Furniture Sets
The Reading Nook is the first furniture piece you should target after the tutorial. It costs 600 Ink Credits, places a small couch and lamp in the corner of your apartment, and unlocks the Financial Insight perk tree — which boosts your earnings on every finance-themed email by 10% per rank. The Gym Mat follows at 800 Ink Credits and unlocks the Muscle Mass tree, which raises your spreadsheet-tossing damage and gives you access to the Establish Dominance achievement (throw one intern off the roof).
| Furniture | Price | Perk Tree | Top Rank Bonus |
|---|---|---|---|
| Reading Nook | 600 | Financial Insight | Email payout +30% |
| Gym Mat | 800 | Muscle Mass | Intern throw damage +50% |
| Bookshelf | 400 | Financial Insight | Free respec, 1x/run |
| Water Cooler | 300 | None | Trevor spawn rate -20% |
| Printer Stand | 500 | None | Overtime unlock at shift 3 |
| Wall Poster | 200 | None | Cosmetic only |
The two perk-tree pieces are non-negotiable for any promotion run, while the Water Cooler and Printer Stand are situational but useful. The Wall Poster is a pure cosmetic flex and is the cheapest furniture in the entire shop. For a full breakdown of every room upgrade and the order in which to buy them, the Worming from Home furniture guide walks through each room in detail.
Shopping Strategy: What to Buy First
The shop rotation never sleeps, but your Ink Credits do — every shift ends when you cash out, and a single misfired email can cost you the equivalent of a cheap trinket. The optimal early-game spending order for the Worming from Home shop is one of the most-discussed topics in community guides, and three rough tiers have emerged from player testing.
Tier 1 — Survival Buys (First Paycheck)
Your first 200–300 Ink Credits should go straight to the Beverage Hat and the Paperclip Pyramid. The Pyramid's +5% spreadsheet accuracy is the single biggest early-game stat boost you can buy, and the hat costs less than a single email payout. Skip the Reading Nook until you have at least 600 credits banked, because buying it halfway through a shift leaves you unable to afford basic hats.
Tier 2 — Promotion Push (Second Paycheck Cycle)
Once you hit the Junior Analyst promotion, redirect your credits toward the Reading Nook (600) and the Stress Cube (75) so you unlock the Financial Insight tree. The perk tree's first rank alone gives you a 10% email payout boost, which pays back the Nook's cost in roughly two shifts. This is also the cycle where you should start saving toward the L-Desk, because its 950 Ink Credit price tag is roughly 1.5 weeks of casual play.
Tier 3 — Cosmetic Completion (Mid-to-Late Game)
After your second promotion, the shop transitions from "survival tool" to "flex zone." This is when you start chasing the remaining trinkets and hats to push toward the Expensive Taste achievement. Because the achievement requires every item in the shop, you will eventually need to buy the CEO Worm Wig (1000 Ink Credits) and the Gold-Plated Stapler (500 Ink Credits) regardless of your playstyle. The deep-dive Worming from Home upgrade priority guide has the full promotion requirement table if you want to plan around the CEO tier.
The L-Desk: Worth Every Credit
The L-Desk is the single most discussed item in the entire Worming from Home shop, and the community is split on whether to buy it immediately or delay it for the Reading Nook. At 950 Ink Credits, it costs more than any other furniture piece in the game, but it is also the only item that permanently changes your earning potential. Once purchased, the L-Desk unlocks a second spreadsheet slot that runs in parallel with your primary job, effectively doubling your per-shift Ink Credits once you master the rhythm.
The Math Behind the L-Desk Payback
A standard shift without the L-Desk yields roughly 150 Ink Credits after a clean run. With the L-Desk unlocked and properly managed, that same shift can hit 280–310 Ink Credits because both spreadsheets are running in parallel during overtime. The payback period for the L-Desk is therefore around 6–7 shifts if you skip other big purchases, or roughly 10–12 shifts if you keep buying trinkets along the way. Players who push for the Expensive Taste achievement generally buy the L-Desk last because every cosmetic purchase delays the refund, while promotion-focused players snap it up the moment they can afford it.
How the L-Desk Changes Daily Routine
Without the L-Desk, your daily loop is email → spreadsheet → cash out. With the L-Desk, the loop becomes email → spreadsheet A → switch → spreadsheet B → overtime → cash out. The switch takes about 1.5 seconds of real-time, and missing the window forces you to restart the second job. According to the official Worming from Home demo page on itch.io, the L-Desk rhythm is one of the first mechanics players master in the demo, and community feedback during Steam Next Fest called it the "true game-changer" of the shop.
Frequently Asked Questions
What is the cheapest item in the Worming from Home shop?
The Motivational Mug trinket is the cheapest item at 50 Ink Credits and is available from your very first shift. It is purely cosmetic but plays a small chime when you finish each email, which makes it a popular starter purchase for new players.
Do hats do anything in the Worming from Home shop?
Hats are pure cosmetics and do not affect stats, but several of them trigger unique dialogue lines from Steve, Trevor, and M during meetings. The CEO Worm Wig is also required for the Expensive Taste achievement, which is why players collect them despite no gameplay benefit.
Is the L-Desk worth buying early in Worming from Home?
The L-Desk is worth buying as soon as you can afford it without starving your promotion track. At 950 Ink Credits, it pays for itself in roughly 6–7 shifts by unlocking a second spreadsheet slot, and it is the only furniture piece that directly increases your earning rate.
How many items are in the Worming from Home shop total?
The full shop contains 14 hats, 10 trinkets, 6 furniture pieces, and the L-Desk for a combined total of 31 purchasable items. Buying every single one unlocks the Expensive Taste achievement, which only 0.8% of players have managed so far.
Can you respec perk trees from furniture in Worming from Home?
Yes, the Bookshelf furniture (400 Ink Credits) unlocks a free one-time respec of either the Financial Insight or Muscle Mass perk tree per playthrough. After the first respec, additional resets cost 200 Ink Credits each, so plan your perk ranks carefully before committing.