Jumping in Worming from Home is less a button press and more a full-body commitment, because you are a spineless invertebrate flinging itself across a home office. This worming from home how to jump guide breaks down charge timing, momentum tricks, and camera controls so thin platforms and parkour sections stop eating your afternoon.
Why Jumping Feels Weird (and Why That Is the Point)
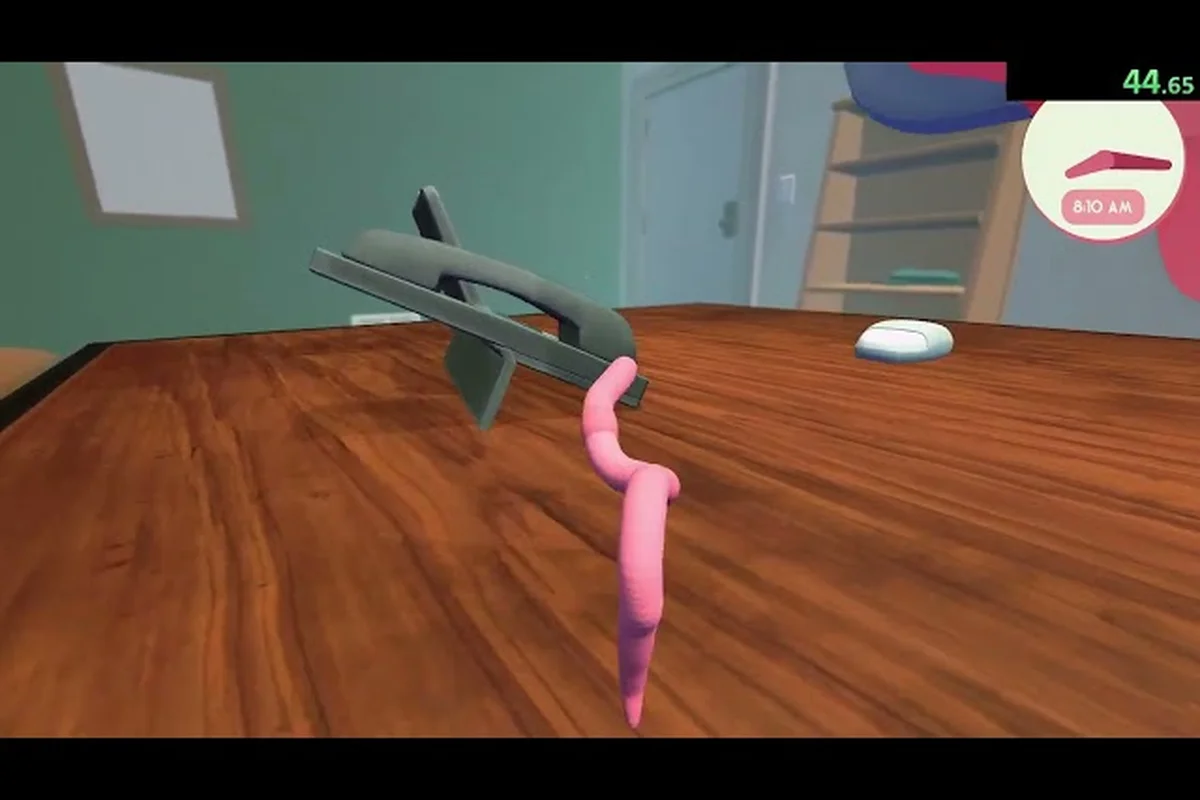
Worming from Home is a ragdoll job sim where you play a junior financial analyst who happens to be a worm, wriggling across a keyboard to answer messages, fill out spreadsheets, and climb the corporate ladder. According to the official Worming from Home Steam page, the whole game is built on state of the art ragdoll physics, which means every jump is a physics simulation rather than an animation. That single design decision explains almost everything about how movement feels.
Because your body has no bones, a jump is really a coil-and-release action. You compress your worm against a surface, store energy in the ragdoll, and then release it in the direction you want to fly. Players who treat jumping like a platformer character jump tend to faceplant into desks; players who treat it like slinging a rubber band clear gaps on the first try. Community reports on the Steam community review hub consistently mention that the parkour hard mode "wasn't too bad once you realise you can full charge every jump," which is the single most important worming from home physics tip in this entire article.
Before we get into technique, here is the core vocabulary you will see throughout this guide. These four terms describe every phase of a single jump: how much energy you load into the coil, how much of your slither speed survives the launch, where your camera is aiming, and what your head does on impact. Learning to name each phase matters because the ragdoll punishes vague inputs — when a jump fails, it is almost always one specific phase that collapsed, and diagnosing which one is what separates a faceplant into the desk from a clean arc onto the far side of the cubicle.
-
Full charge — holding the jump input until the coil animation maxes out before release
-
Momentum carry — preserving horizontal speed from a slither into the jump itself
-
Camera lead — pointing the camera slightly above your landing target so the ragdoll arcs correctly
-
Head bash — deliberately diving headfirst into the keyboard, which doubles as both movement and typing
If you are still fumbling with the baseline inputs before attempting any of the jump techniques in this guide, the Worming from Home controls guide covers keyboard and touch keyboard layouts in depth, including how the coil-and-release input maps differently across each layout. It pairs especially well with the movement fundamentals below, because a half-second delay in registering your jump input can collapse the full charge phase entirely — and once you can load and release the coil without thinking about which key does what, diagnosing failed jumps becomes far easier.
The Core Jump Technique: Coil, Aim, Release
Charging Your Jump Properly
Every jump in the game runs on the same three-phase loop, and skipping a phase is the number one reason worms splat short of the couch. The loop looks simple on paper, but each phase has timing details that change your distance dramatically.
| Phase | What You Do | Common Mistake | Result When Done Right |
|---|---|---|---|
| Coil | Press and hold jump while pressed against a surface | Tapping instead of holding | Weak hop, maybe 30% of max distance |
| Aim | Rotate the camera toward your landing spot | Aiming at the gap, not past it | Undershooting thin platforms |
| Release | Let go at full charge, ideally mid-slither | Releasing while stationary | Straight-up launch with no horizontal carry |
The full charge rule matters most in the late-game parkour section. Multiple players who finished 100% completion report that once they stopped half-charging out of impatience, the final platforming gauntlet went from frustrating to routine. A full charge takes roughly a second of hold time, and because the game is intentionally glitchy in a fun way, an overcharged release occasionally produces chaotic bonus distance rather than a penalty.
Aiming with the Camera, Not the Worm
Here is the counterintuitive part of worming from home how to jump: your worm does not really aim, your camera does. The ragdoll launches roughly toward where the camera looks, with a slight upward bias baked into the physics. That means you should aim above your target, not at it, letting gravity bring your arc down onto the landing zone.
A practical aiming drill that community players swear by: pick a fixed object like the desk lamp, jump to it five times aiming directly at it, then five times aiming a worm-length above it. Most people gain noticeable distance with the second method. This is one of those worming from home camera controls adjustments that costs nothing and pays off immediately, especially on the thin platforms that players consistently call the hardest part of the game.
Momentum Tricks: Turning Slithers into Flights
The Slither-Jump Combo
A stationary jump gets you height. A moving jump gets you height plus horizontal distance, and the difference is enormous. The trick is to build a slither rhythm first — two or three body waves in your direction of travel — and release the jump at the peak of a wave rather than between waves. Because the ragdoll inherits your velocity at the moment of release, timing the release to a wave peak effectively converts slither speed into flight speed.
| Jump Type | Setup | Approximate Distance | Best Used For |
|---|---|---|---|
| Stationary hop | Full charge, no movement | Short | Keyboard bashing, small adjustments |
| Slither-jump | 2-3 waves, release at peak | Medium | Desk-to-chair crossings |
| Momentum fling | Full charge + wave peak + camera lead | Long | Parkour sections, thin platforms |
| Head-bash dive | Aim down and release | Short, fast | Typing with your body, printer tasks |
The momentum fling is the advanced version and the closest thing the game has to a skill ceiling. You combine a full charge, a wave-peak release, and a camera pointed well above the target. When all three line up, your worm sails across the room in a glorious arc, which is exactly the kind of moment the game is designed around. For more flinging technique beyond jumps specifically, the Steam Deck settings and flinging guide covers accessibility options that make sustained input easier.
Chaining Jumps Without Losing Speed
Landing kills momentum if you land flat, because the ragdoll absorbs all that lovely velocity into a wobbly pile of worm. The fix is to land on a wave, meaning you input a slither direction just before touchdown so your body keeps flowing instead of stacking. Players describe the rhythm as jump, aim, land-and-wiggle in one continuous motion, and once it clicks you can chain three or four jumps across the office without ever fully stopping.
This chaining matters outside of parkour too. Several daily tasks and calendar events have timers, and shaving two seconds off every room crossing adds up across a workday. The daily tasks and calendar guide breaks down which tasks are actually timed, so you know where fast movement genuinely pays.
Typing with Your Body: Jumping as a Work Skill
Head Bashing for Speed
One of the funniest design overlaps in Worming from Home is that movement and work use the same body. Typing with your body means diving headfirst into keys, and a controlled head bash is genuinely one of the fastest ways to type faster in the message and spreadsheet minigames. The technique: coil on the keyboard edge, aim your head at the letter cluster you need, and release with a short charge. A full charge here is overkill and will launch you clean off the desk.
Community players who speed through the work minigames recommend a short-charge tap rhythm instead — quick coils, quick releases, keeping your head bouncing across the keys like a woodpecker. If you want a deeper breakdown of each office minigame and its scoring quirks, the typing minigame and keyboard bashing guide covers head-bash angles per task type.
When to Jump Versus When to Slither
Knowing worming from home worm movement tips means knowing when not to jump. Slithering is slower but precise, and precision is what the Spreadsheet and Stock Market tasks actually demand. Jumping is fast but scattergun, ideal for the Messages app where any keypress counts. A simple rule of thumb:
-
Jump or head bash for Messages, Video Call, and Printer tasks where speed beats accuracy
-
Slither for Spreadsheet cells and stock trades where hitting the wrong key costs real progress
-
Full-charge fling only for traversal, never for typing, unless you enjoy restarting spreadsheets
Camera Tweaks That Fix 90% of Missed Jumps
Because the camera drives your launch direction, camera settings are effectively jump settings. The default camera works fine on a mouse, but players on trackpads and handhelds report that a slightly higher camera sensitivity makes wave-peak aiming far easier, since you can flick up to the lead position and back down without dragging across the whole pad. If your jumps consistently drift left or right, that is almost always a camera issue, not a physics issue — the ragdoll launches where you look, drift included.
Three camera habits worth building, in rough order of payoff: they cover where the crosshair sits during flight, when you lock your aim relative to the charge, and how much of the level you can actually see. Each one attacks a different failure mode — late corrections, mid-charge drift, and misjudged landing platforms — so they stack rather than overlap. Players who adopt all three usually find their jumps stop drifting within a session or two, before they even touch sensitivity settings.
-
Lead the arc: keep the crosshair one worm-length above your intended landing spot
-
Pre-aim before coiling: set the camera direction before you start charging, because adjusting mid-charge twists your launch
-
Zoom out for long flights: a wider view makes thin platforms easier to judge, especially in the final parkour section
These worming from home camera controls tweaks cost nothing and compound with the momentum tricks above. A well-aimed camera plus a full charge plus a wave-peak release is the complete formula, and players who internalize all three report the hard-mode parkour going from a wall to a speed bump. As the Screen Hype review of the game noted, this is a short, wacky experience of only a few hours — which means every minute spent fighting the camera is a minute stolen from the actual jokes.
Common Jumping Mistakes and Quick Fixes
Even with the coil-and-release technique down, a few failure patterns dominate player reports, and most trace back to one of three root causes: incomplete charge, misaligned camera, or mistimed release relative to the worm's wave cycle. Because the jump physics in worming from home calculate launch power from coil compression rather than hold duration alone, a half-charge can look deceptively close to a full one at low camera angles — which is why so many "short jump" complaints resolve once players zoom out and watch the coil max visually. The table below maps each symptom to its likely cause and fix, based on accumulated community experience with the game's momentum and slither-input physics, so you can match what your failed jump actually looked like to the correction that addresses it.
| Symptom | Likely Cause | Fix |
|---|---|---|
| Jumps always fall short | Half-charging out of impatience | Hold until the coil visibly maxes |
| Jumps drift sideways | Camera not centered pre-charge | Pre-aim before coiling |
| Landing kills all speed | Flat landing, no slither input | Input a wave direction on touchdown |
| Flying over targets | Aiming at target instead of above it | Actually aim lower — you are over-leading |
| Bouncing off thin platforms | Releasing between waves | Time release to a wave peak |
The last row deserves emphasis because thin platforms are the community's most-cited pain point. The fix is patience: approach the platform with a slow slither, coil fully while pressed against the launch edge, and release at the wave peak with the camera led high. It feels slow the first five times and automatic by the tenth.
Frequently Asked Questions
How do I jump farther in Worming from Home?
Hold the jump input for a full charge before releasing, build two or three slither waves first, and release at a wave peak while the camera points above your target. Combining full charge, wave-peak timing, and camera lead produces the longest possible flight distance in the game.
Why do my jumps keep missing thin platforms?
Thin platforms punish half-charged jumps and mid-charge camera adjustments. Approach slowly, set your camera lead before coiling, hold for a full charge, and release at a wave peak. Players report this exact combination makes the late-game parkour section manageable rather than punishing.
Does jumping help me type faster?
Yes, for speed-focused tasks. Short-charge head bashes across the keyboard are the fastest way to fill Messages and Video Call inputs, because any keypress counts. For Spreadsheet and Stock Market tasks that need precision, slither to the exact key instead of jumping.
Do I need to upgrade anything to jump better?
No upgrade is required, though the Muscle Mass perk tree from the gym improves your body's overall strength, which players report makes charged jumps feel snappier. The core jump distance comes from technique — charge, timing, and camera — rather than from purchases.
Is the physics glitchy on purpose?
Yes, and that is part of the charm. Community reviews describe the game as glitchy in a fun way, with ragdoll chaos producing occasional bonus distance or absurd bounces. Nothing game-breaking happens unless you go looking for it, so treat weird launches as features, not bugs.
Mastering the jump in Worming from Home comes down to three habits that stack: always full charge, always release at a wave peak, and always lead with the camera above your target. Add the short-charge head bash for typing tasks and the momentum fling for parkour, and the ragdoll that once threw you off desks becomes the most entertaining movement system you have wriggled through in a job sim.